
Photo Studio Ultimate 2025 Features
ACDSee Photo Studio Ultimate is packed with features to help you manage, search, view, develop and edit your photos. Learn more about these features below.

Photo Studio Ultimate 2025 Features
ACDSee Photo Studio Ultimate is packed with features to help you manage, search, view, develop and edit your photos. Learn more about these features below.
Organize & Search
Facial Recognition & Face Detection
The AI-powered Face Detection & Facial Recognition tool will find the humans in your photographs so you can name them for quick searching. ACDSee will immediately learn which names to put to which faces, and suggest possible matches when needed.
 People Mode
AI-driven mode for identifying and managing people in your portfolio. Photographers from all walks of life will enjoy the ease of merging, renaming, or deleting faces in People Mode. Whip through tasks, like labeling unnamed faces, as your cursor automatically advances to the next face when you press enter; and quickly accept or deny batch labeling suggestions from the AI assistant for speedy naming of similar unnamed faces. Hover over a face in People Mode to see a pop-up thumbnail preview of the entire image, just like in Manage and Media Modes. Select from a plethora of metadata options such as Shutter Speed, Lens Make, Image Type, and more to get the full picture.

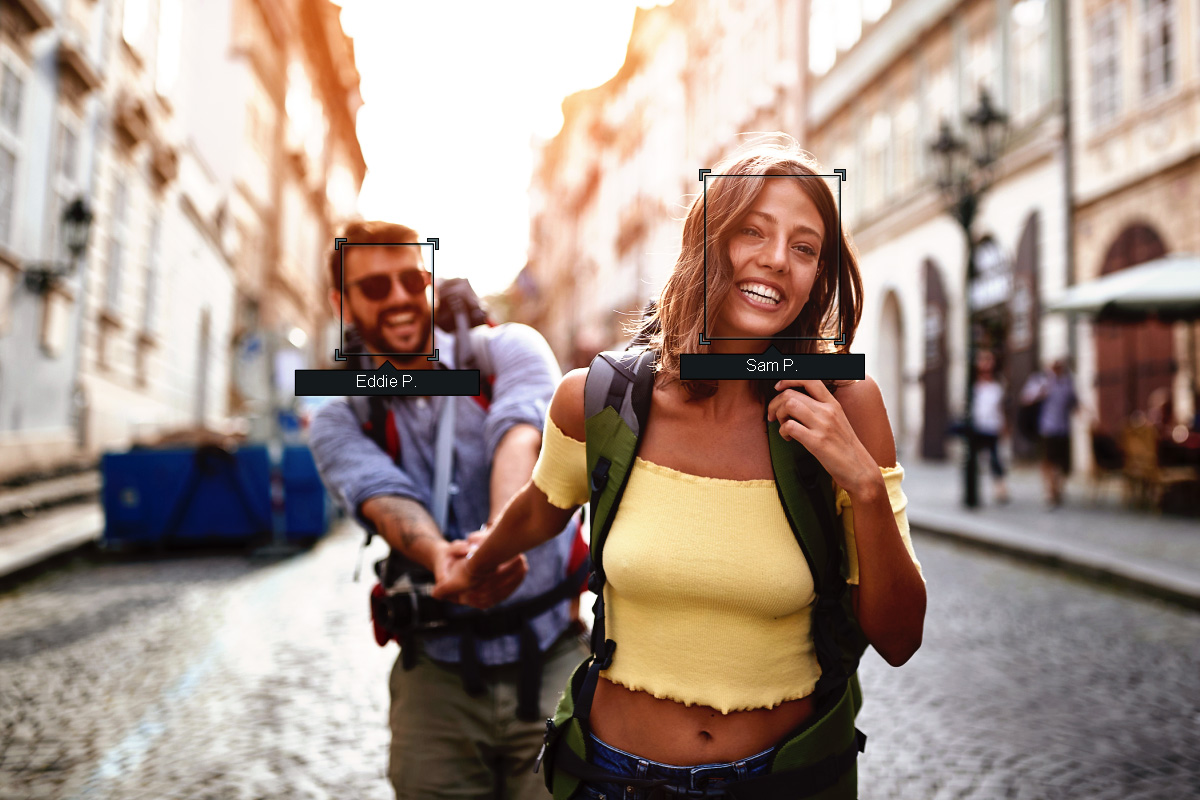


Facial Recognition & Face Detection
The AI-powered Face Detection & Facial Recognition tool will find the humans in your photographs so you can name them for quick searching. ACDSee will immediately learn which names to put to which faces, and suggest possible matches when needed.
 People Mode
AI-driven mode for identifying and managing people in your portfolio. Photographers from all walks of life will enjoy the ease of merging, renaming, or deleting faces in People Mode. Whip through tasks, like labeling unnamed faces, as your cursor automatically advances to the next face when you press enter; and quickly accept or deny batch labeling suggestions from the AI assistant for speedy naming of similar unnamed faces. Hover over a face in People Mode to see a pop-up thumbnail preview of the entire image, just like in Manage and Media Modes. Select from a plethora of metadata options such as Shutter Speed, Lens Make, Image Type, and more to get the full picture.

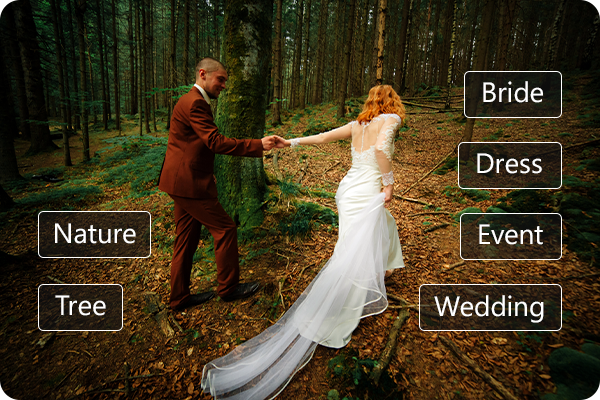
AI Keywords
Have you ever been looking for that certain photo, one you know you have, but just can’t find? Say goodbye to the hunt with zero-effort AI Keywords. Search and find photos fast, cutting out the tedium of manually assigning keywords or hunting through thousands of photos for the perfect one. Make finding your latest trip to the beach as simple as searching “Beach”, effortlessly find all of your pet photos, or bring together your culinary creations to share in an instant. Make every photo discoverable and give them the love they deserve with AI Keywords.
Keyword Management
In addition to AI Keywords, ACDSee comes pre-loaded with a variety of usable sample quick keyword sets to speed up the process of manually assigning keywords. Export keyword lists and share them with other users. Save countless hours of manual entry by importing established keyword lists.
Add ratings, tags, categories, customizable color labels, and other metadata to further organize your photos.
 Categories and Keywords
Stay organized by assigning Categories and Keywords to your images. Multi-select Categories or Keywords for efficient labeling or deleting. Filter through long lists by typing the Category or Keyword you’re looking for and watch as the filtered results are dynamically generated. Dig as deep as you need to with large Keyword and Category trees knowing ACDSee is optimized to perform.
Advanced AND/OR Search
Choose from numerous search criteria, including ACDSee Metadata and EXIF & IPTC fields. Built-in logic for AND/OR states let you narrow down results to a microscopic level.
Quick Search
Launch your search with Quick Search and get results right away. Choose from various search types and fine tune your results.
Location Data
Add photo locations from anywhere in the world to your photos. You can then recall and view that information for reference at any time. Use the map to select groups of files for further workflow steps, and select photos for display in View mode.
Performance
Fast launching, mode-switching, working with keywords & categories, RAW decoding, and database maintenance, ACDSee lets you focus on the task in hand.
Management & Workflow
 ACDSee Activity Manager
Meet your new basecamp for background processes: ACDSee Activity Manager. Toggle AI Keywords and Face Detection on or off, view how many images remain to be scanned, and manage your imports easily from within the Queued Activities section. Once completed, history can be viewed within the Activities History section.
 ACDSee Tabs
ACDSee Tabs function just like web browser tabs, providing a familiar and intuitive experience. Open multiple folders within a single window and effortlessly switch between tabs to navigate your files, simplifying your workflow and enhancing your productivity with the clean, streamlined interface that brings all your digital asset collections together in one place.
Database Management
Create as many ACDSee databases as you like, and quickly and easily switch between them. Use separate databases for separate clients, keep work and personal files separate while working on the same machine, or experiment with a new keywording and labeling system without losing an established system.
Media Mode
Streamline your folders using ACDSee’s database-driven Media Mode, which only displays folders you’ve cataloged and previously browsed in Manage Mode. Sort, group, or filter your files in any combination, as well as assign and read ACDSee Metadata, EXIF, and IPTC.
 Metadata Management
Simplify the process of migrating and sharing category and keyword metadata by integrating your ACDSee metadata with IPTC and vice versa. Import IPTC Keyword and Category data from received photos into ACDSee, to ensure seamless photo organization, regardless of their source. Intuitively embed ACDSee Category and ACDSee Keyword metadata to your photos to share with friends and family.
Duplicate Finder
Find duplicates across a variety of folders and locations. Rename or delete detected duplicates to keep your file collection under control.
Batch Rename
A dynamic and efficient process for renaming multiple files. Add or remove text, use a template, rename in series, and more; the options are almost endless.
Batch Resize
Resize multiple images to any dimension, following pixels or percentages, along either edge, or as a print size.
Batch Crop Tool
Relative positioning functionality allows you to crop multiple images in seconds.
Watermark Tool
Add watermarks with accuracy – particularly beneficial for applying watermarks to a batch of images.
Cloud Access
Get files from the team over Dropbox ™ or OneDrive ™ or back up existing work with direct access to cloud sync root drives within Manage mode.
OneDrive™ Support
Keep your OneDrive™ files online until you are ready to view or edit them, then download individual files or whole folders. Easily move files from your PC into OneDrive™, and control whether OneDrive™ keeps local copies or offloads them to the cloud.
Image Baskets
Create up to five image baskets to gather and hold images and media files from all over your hard drive. Name individual image baskets and use them to easily view, edit, or share their content.
Customizable Appearance
ACDSee Photo Studio is completely customizable. For enhanced workflow efficiency, you can tear off, move, stack, dock, and hide panes and toolbars anywhere you like.
View & Share
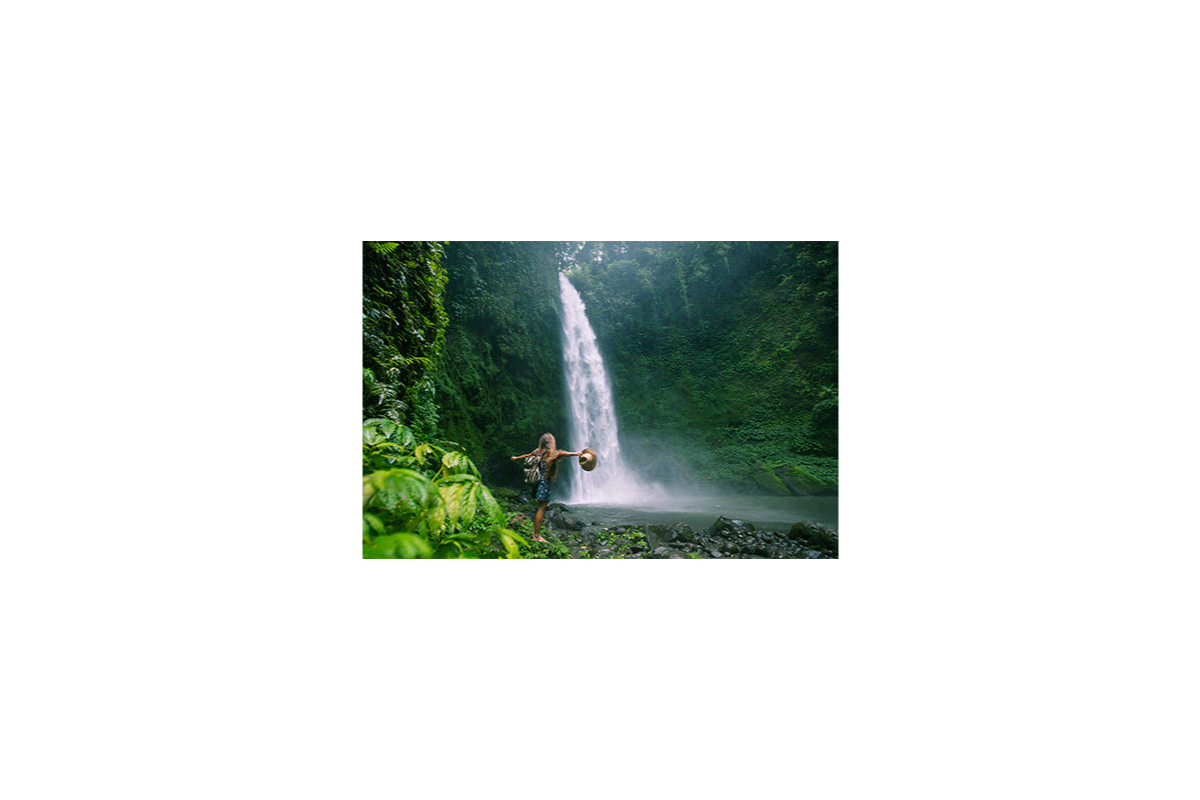

 ACDSee AI Super-Resolution
Maximize the pixels in your images with ACDSee AI Super-Resolution. AI Super-Resolution intelligently upscales images while reducing noise and blurriness, eliminating artifacts, and maintaining details. It improves contrast and sharpness, resulting in clearer, more detailed upscaled images. Prepare multiple shots for large-scale printing, breathe life into old photos, or upscale low-resolution images in one swift move with Batch AI Super-Resolution.
 Camera RAW Update
Built-in support for over 700 RAW camera models and climbing proves keeping pace with new camera technologies & equipment has been a touchstone of ACDSee software development. View supported cameras.
Document Viewing
Flip through your PDF and Microsoft Office™ documents— even sheets on multi-tabbed Excel™ documents. Rank your digital assets based on importance. Discard and back up accordingly.
 Comprehensive File Support
Enjoy comprehensive support for all of the most popular file formats. Read/write static AVIFs for superior compression, view transparent and animated .WEBP files, work directly with GoPro RAW images to perfect your adventures, and so much more. View supported file formats.
High ISO Support
ISOs above 200,000 are supported in cameras by Canon, Nikon, Pentax, and Sony.
ACDSee Mobile Sync
Wirelessly and instantly send photos and videos directly to ACDSee Photo Studio from your mobile device by scanning the QR code on your monitor! The app is available on iPhone and Android. Learn more.
SendPix™ Integration
Use SendPix™, integrated into Photo Studio, to send your photos to friends and family. ACDSee will automatically convert your RAW images to JPEG so everyone can view them everywhere. Use the web, desktop, or mobile applications to easily access your images wherever you need them. Learn more about SendPix™.
Artificial Intelligence (AI) Selection Tools

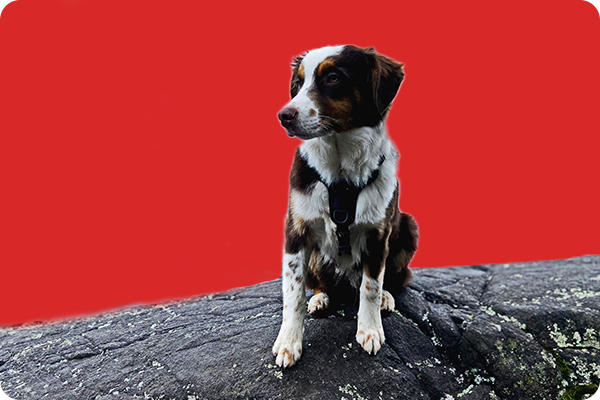
 Non-Destructive AI Masking
Save countless hours editing your images, including RAW files, using the Artificial Intelligence (AI)-powered masking tools in Develop Mode. The updated Masking Group gives you a new way to quickly create intricate masks by loosely outlining objects in your image with the AI Object tool and letting the AI make the complex selection. Automatically mask the subject, background, or sky in your photos using AI Sky, AI Subject, or AI Background. These masks allow you to easily edit specific parts of your photos, while preserving the original file, to truly bring out the best in your photos non-destructively.
 Develop Mode Masking Group
Keep all your non-destructive selection masks in one convenient place! Use the Masking Group to duplicate, copy, paste, invert, and delete masks. Refine selection masks using Feathering and Shift options for easy blending, expanding, and contracting.

 AI Sky Replacement
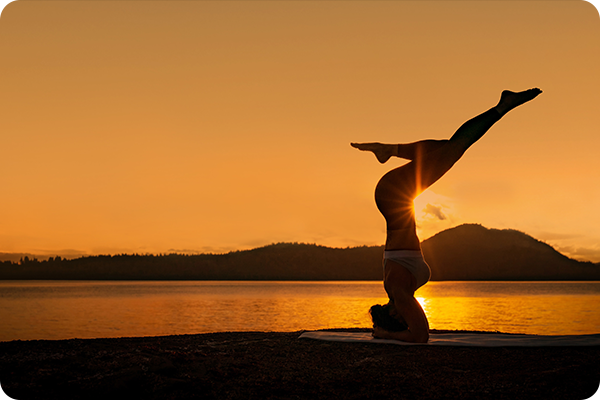
Venture beyond the horizon with AI Sky Replacement. Redefine your landscape with ease by swapping out the sky in any photo, achieving a seamless and natural look. Explore an array of pre-installed skies or import an original shot to turn your grandest visions into epic realities. AI Sky Replacement in ACDSee Photo Studio 2025 comes with a variety of new and exciting skies, including two completely new categories: Overcast and Fireworks. Give your skies the perfect cozy fall feel, or brighten up your night skies with colorful, illuminating displays.
AI Actions
The AI Actions panel in Edit Mode houses helpful one-click selection features: AI Select Subject, AI Select Sky, AI Select Background, AI Remove Background, AI Blur Background, and AI Black & White Background. The AI gives you precise edges when selecting your subject and masks with significantly fine details.
AI Object Selection Tool
With AI Object Selection tool, roughly outline multiple objects you would like to select and let AI do the rest. The tool will automatically create precise selections around the objects that were outlined, saving you both time and the need to manually cut-out objects.
Selection Tools
 Non-destructive Color and Luminance Range Masking
Use Color and Luminance Ranges to chart the most vivid hues and deepest shadows in your image. Fearlessly highlight the vibrant reds of a sunset or the mysterious darkness of a forest and craft a visual adventure that captures every nuance of color and light knowing you can revert to your original image at any time.
Pixel Targeting
Make pixel perfect selections of distinct tones, color, and skin tones using Luminance and Color ranges. The brighter a pixel is, the stronger a selection will be on that pixel.
Shape Selection Tool
Use the Shape Selection Tool to make complicated selections with curves and corners.
Refine Selection
Use Refine Selection to shift or soften edges which can maximize the effect of tools like Smart Erase.
Channel Selection
Make selections and masks in Edit Mode based on the image’s Color Information Channels.
Channel Filtering
Modify a targeted color channel and blend the edit with existing color channels in the image.
Selection Basket
Gather and hold complicated image selections for applying to future images and masks in Edit Mode.
Photomerge Tools
Panorama Stitching
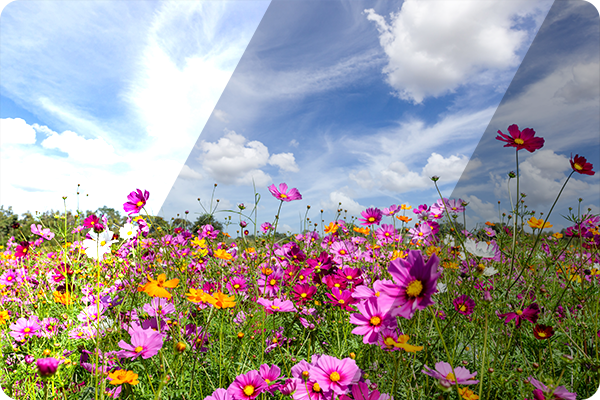
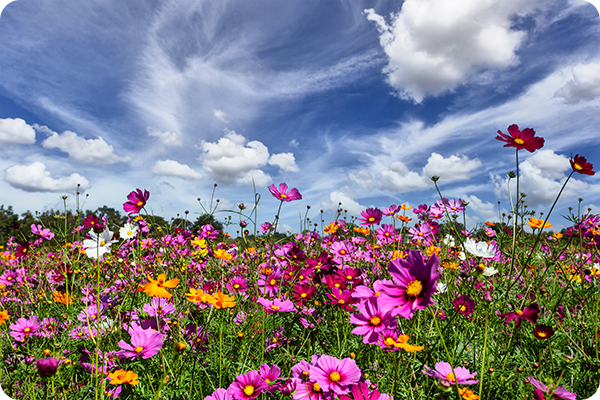
Combine photos into a panorama image. Use options like remove vignetting to clean up the edges where the photos meet.
High-Dynamic Range (HDR)
Flexible and powerful HDR tool for producing high-quality merged images. Run High-Dynamic Range (HDR) to bring out the details in both the foreground and background.
Focus Stacking
Combine a series of images with different focal lengths to create an image with a greater depth of field.
Portrait Retouching Tools
AI Face Edit
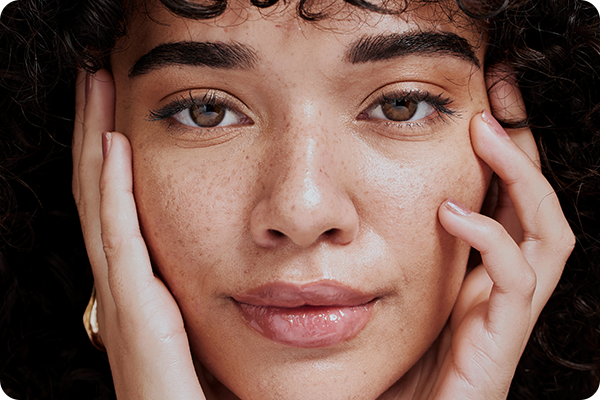
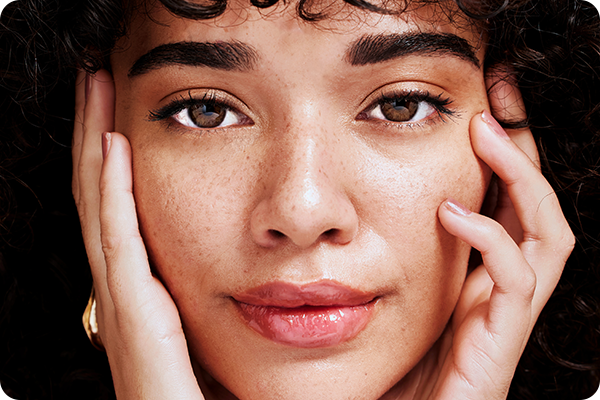
With the power of AI, detect faces and enhance facial features using highlight and contour, remove blemishes, smooth skin, whiten eyes and teeth, and much more. Retouching portraits with ACDSee isn’t just powerful – it’s an adventure!
Skin Tune
Use the Skin Tune tool to even tone and restore glow in your subjects, as well as brighten and smooth.
Red Eye Tool
Automatically remove red eyes from the faces in your photos.
Repair Tools
Blended Clone Tool
Use the Blended Clone tool to copy pixels from a source area to a target area. ACDSee analyzes the pixels in the target area and blends them with the copied pixels for the most seamless repair yet.
Heal
Remove image flaws using the Healing Brush on complicated textures like skin or fur.
Clone
Remove image flaws using the Cloning Brush for strong, simple textures or uniform colors.
Smart Erase
Brush over unwanted objects with the Smart Erase tool and watch them disappear instantly. The Smart Erase tool fills in the area naturally.
Dehaze
Restore contrast, detail, and lost color to your images. This tool is especially useful for images that have been captured through a haze.
Liquify
Retouch images by moving pixels, not changing them, for limitless photo manipulations.
Noise Reduction
Reduce noise in your images caused by high ISO or long exposure. Use the Luminance and Tone sliders for greater results.
Sharpen
Sharpen your photos by enhancing medium and high contrast edges.
Clarity
The Clarity tool adds subtle definition to the details in your image. Use it to enhance the contrast of midtones in your images, without overpowering the shadows and highlights.
Chromatic Aberration
Heal colored fringes on the borders of high contrast areas with the Chromatic Aberration tool.
Rotate & Straighten
Rotate your images at preset or custom angles in Edit mode. Specify the straightening angle by drawing a line on your image. You can save your settings as a preset for future use.
Flip
Flip your images both vertically and horizontally in Edit mode.
Perspective Correction
Easily adjust the perspective of your photo so large or far-away objects are the correct size.
Distortion Correction
Correct barrel, pincushion, and fisheye distortion in your photos.
 Lens Correction
Automatically correct barrel and pincushion distortion by applying the fix calibrated for the distortion inherent to the lens you used. More lenses have been added to the supported Lens types.
Color Correction Tools
White Balance
Instantly give your photos more warmth or coolness, or use the White Balance tool to remove unwanted hue from your images.
Curves
Change the tonal range of your image using the Curves tool. Select the RGB color channel to adjust the entire range of the image, or select a specific color. Get precise curve control through numerical display of curve points and adding or deleting points on the curve.
Color Wheel
Focus on precise colors throughout your image to manipulate with a new level of precision. Accurately brighten grey skies and dull reflections.
Tone Wheels
User-friendly tone wheels make split-toning highlights, midtones, and shadows easy.
Color LUTs
Use ACDSee’s built-in Color LUTs to seamlessly color grade your images, or import and apply LUTs as non-destructive filters.
Color EQ
Use the Color EQ (hue, saturation, contrast, and brightness) tool to adjust overall colors in your image or each color individually. The advanced tools can subtly fine-tune and enhance colors, or completely change individual colors in your images.
Split Tone
Split Tone allows you to tint shadows and highlights with non-destructive edits.
Black & White
In Black & White mode, increase or decrease the contrast of each individual color, and specify the brightness range that the contrast adjustment will target.
Lighting Tools
Light EQ™
Adjust areas in your image that are too dark or too light, without affecting other areas of the photo. You can also simultaneously brighten dark areas that are too dark, and darken areas that are too bright.
Exposure
Use the Exposure tool to automatically or manually adjust your image’s exposure, contrast, and fill light. Target specific areas of your image using the Edit Brush or Gradient tool to limit where the exposure adjustment occurs.
Contrast
Adjust contrast in specific tones and target precise brightness ranges to bring out contrast details in highlights or shadows.
Dodge & Burn
Use the Dodge and Burn tool to lighten or darken areas in your photo without affecting other areas. The tool is often used to lighten underexposed areas or darken overexposed areas.
Levels
Use the Levels tool to precisely adjust the contrast and light levels in your images.
Auto Levels
Automatically correct the exposure levels of your images. Auto Levels makes the darkest image pixels darker, and the brightest pixels brighter.
Layered Image Editing
 Layer Masks
Build composite images using Layer Masks. Copy color images and paste them as luminance masks on other layers, including adjustment layers. You can also apply a mask as a new layer with a click in Edit mode.
Adjustment Layers
Use adjustment layers to change exposure, levels, curves, white balance, split tone, add a gradient map, and more. You can also create a negative out of your image in just one click.
Layer Effects
Add inner glow, shadows, a bevel, an outline, or blur between your image and text layers.
Blend Modes & Opacity
Choose from 25 layer Blend Modes, like Overlay and Multiply, and adjust the opacity of that layer to affect your final image.
Actions
Create an Action by recording your editing process, categorize and manage your Actions, and batch apply any of 125+ pre-loaded Actions to multiple images at once.
Frequency Separation
Separate your image into high frequency and low frequency layers to remove imperfections while retaining detail.
Layered Color LUTs
Develop your own LUTs using an infinite combination of colorful adjustment layers. Use your LUTs as Edit mode filters, Develop mode filters, or additional adjustment layers.
Multi-Select Layers
Pull groups of images into the Layers pane and select one, some, or many.
Align & Blend Layers
Auto-align or auto-blend layers of images taken in a burst to achieve one optimal version of the subject.
Rulers & Guides
Customizable rulers and guidelines make placing layers, text, and objects foolproof. Snap layers to guidelines. Lay as many guidelines as you like. Control the unit of measure, color, and visibility.
Canvas Resize
Resize the canvas to expand around your layered content or add solid backgrounds for limitless photo manipulations.
Geometry
Snap objects, text, and images to the top, bottom, sides, or corners of your canvas while moving. Display a grid for precision situating.
Creative Tools
Edit Brush
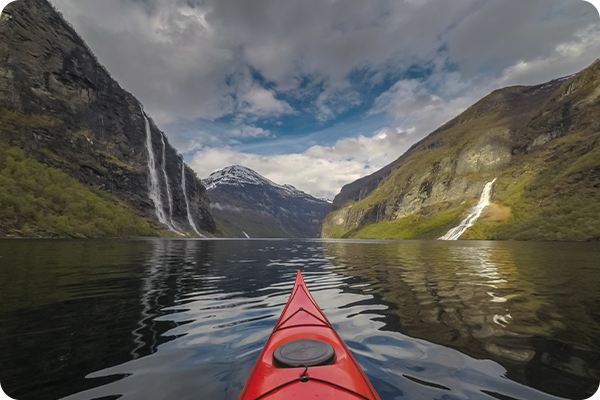
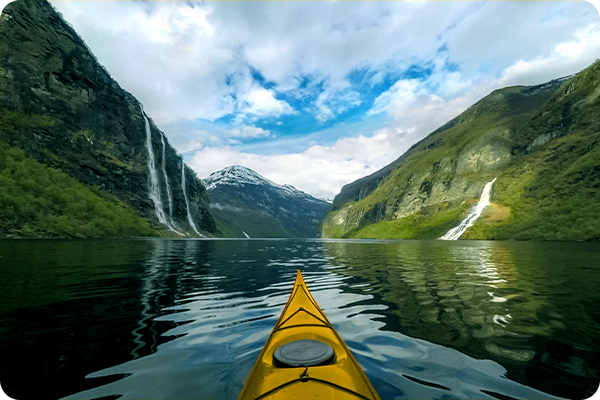
With options for Flow, Opacity, and Jitter, you’ll find using the Brush tool in Edit Mode feels natural and provides precision. Flow controls allow you to adjust the speed at which the brush builds up, allowing you to increase or decrease how powerful each stroke is. Opacity controls allow you to set a hard limit on the brushing intensity, while Shape and Color Jitter settings add randomization into every stroke.
Grain Tool
Give your images a cool, vintage appearance with the Grain tool. Adding Grain can improve your photos in many ways by giving images some texture and depth. In certain cases of badly focused photos, adding Grain can give your image more detail and even make it easier to view.
Blur
Apply different kinds of blur to your photos.
Special Effects
Instantly transform your photo with special effects that can turn images into a pencil drawing, collage, Bob Ross-style painting, and many more unique looks.
Tilt-Shift
Use the Tilt-Shift effect to create emphasis on specific subjects in your photos, or make your photos look like miniature landscapes.
Add Border
Add a border to your favorite photos. Customize the color, texture, and thickness to suit your shot.
Add Vignette
Add a vignette and adjust the size, color, and opacity to perfectly complement the mood of your photo.
Text Tool
Customize font, size, color, style, justification, opacity, and much more, while layering, blending, and adding effects for the ultimate composites. Forge your own text path. Write on a curve, follow a shape, or add a dynamic text layer that updates within a customizable frame. Great for digital photographic ads and inserts.
Posterize Effect
Reduce the number of brightness levels in your image by applying a Posterize adjustment layer. The lower the value, the fewer colors used in the image.
Add Noise
Add noise in your photos while preserving details that you want to retain.
Detail Brush
Use the Detail Brush to cumulatively highlight important details in your photo, and remove the emphasis off others.
Develop Presets
Create spectacular looks in a single click with 60+ Develop Presets, or design your own custom Develop Presets and save time applying your signature style to future photos.
Editing Workflow & Productivity Tools
 Fast AI-Powered Performance
ACDSee uses the full might of your Graphics Processing Unit (GPU) for accelerated AI-driven editing. This power boost makes using AI-integrated tools – such as AI Masking, AI Sky Replacement, and AI Super-Resolution – incredibly fast to keep your productivity flowing.
Develop Settings Pane
View adjustments made to your images in Develop mode, copy those adjustments and paste them onto other images, or restore the image – all from within the convenience of Manage mode or View mode.
Presets & History Pane
A dedicated Develop Mode pane to enhance your editing process. Create and categorize a library of presets or take snapshots and view your full edit history.
Import & Export Develop & Edit Presets
Distribute your presets to others by exporting, or relish in others’ work or processing you did in the past by importing.
Import & Export Actions
Share your Actions with other users by exporting them as convenient, compressed packages, or receive Actions made by friends, enjoying the limitless creative potential of recorded Actions.

Photo Studio Ultimate 2025
NAVIGATE YOUR CREATIVE PATH AND DIGITAL ASSETS WITH AI-POWERED PRECISION
Upgrade to Ultimate 2025
Upgrading to the latest version of ACDSee Photo Studio Ultimate is quick and easy. Settings from Ultimate 2022 and up, such as Search History and select Presets, are automatically imported to Ultimate 2025 upon launch. With these preferences and more immediately migrated into ACDSee Photo Studio 2025, you spend less time setting up camp and more time exploring. If you are upgrading from any previous version of ACDSee Photo Studio Ultimate, sign in to your acdID account to receive your exclusive upgrade offer.
Learn more about the perks of upgrading by comparing the latest releases.
Why choose ACDSee?
For over 30 years, ACDSee has been committed to developing software that makes your life easier. This year’s release of ACDSee Photo Studio 2025 is no exception.
![]() PRODUCT SUPPORT
PRODUCT SUPPORT
System Requirements
To activate your software, to validate your subscriptions, or to access online services, you will need a valid email address and an internet connection.
Intel® or AMD® processor with 64-bit support
Intel i5 or better processor recommended
4 GB RAM (8 GB RAM or more recommended)
512 MB Video RAM (VRAM) (2 GB VRAM or more recommended)
DirectX 10 compatible graphics adapter (DirectX 12 with feature level 12_0 or later recommended)
1280 x 800 display resolution (1920 x 1080 recommended)
4 GB of available hard drive space
Windows® 10 (64-bit editions only) & Windows® 11
Microsoft® Edge®
Microsoft® DirectX® 10 or higher
Windows Media® Player 9.0
Microsoft® Office 2010 or above
Builds
Release Notes
Release Notes
Product Documentation
Use the links below or press F1 while performing any function in ACDSee to open the relevant online help page.
Helpful Links
ACDSee Video Tutorials
ACDSee Connect
ACDSee Support Center
ACDSee Product Forum
Migrate from Photoshop™ & Lightroom™
RAW File Support
Supported File Formats
ACDSee Plug-ins
ACDSee Product Comparison
ACDSee Competitor Comparison
ACDSee SDK
Contact Customer Support
30-Day Money Back Guarantee
Our 30-Day Guarantee means if you aren’t fully satisfied, just let us know, and you will be fully refunded on any purchased ACD Systems product.


